
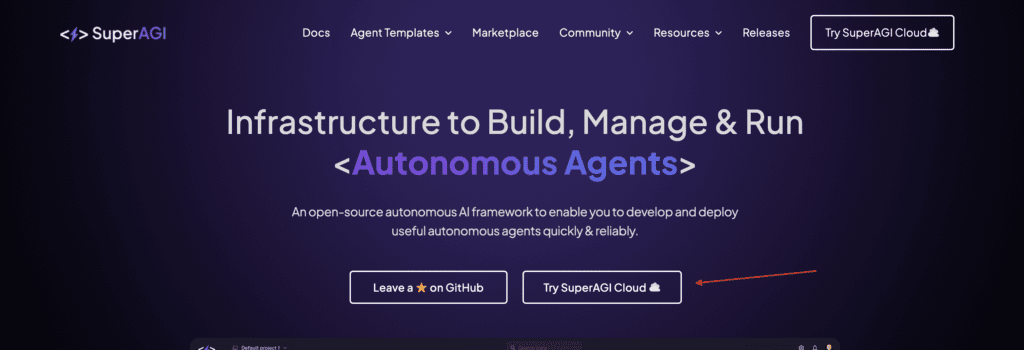
Have you ever wondered how to supercharge your AI capabilities? Are you looking for a powerful, user-friendly tool that can run multiple AI agents concurrently? If so, you’ve come to the right place. Welcome to the world of Super AGI, an open-source autonomous AI agent framework that’s taking the tech world by storm.
In this step-by-step guide, we’ll answer these questions and more. We’ll walk you through the entire process of installing Super AGI, from setting up the prerequisites to configuring the environment variables and running your first agent.
So, are you ready to unlock a new level of AI functionality? Let’s dive in!
What is SuperAGI?
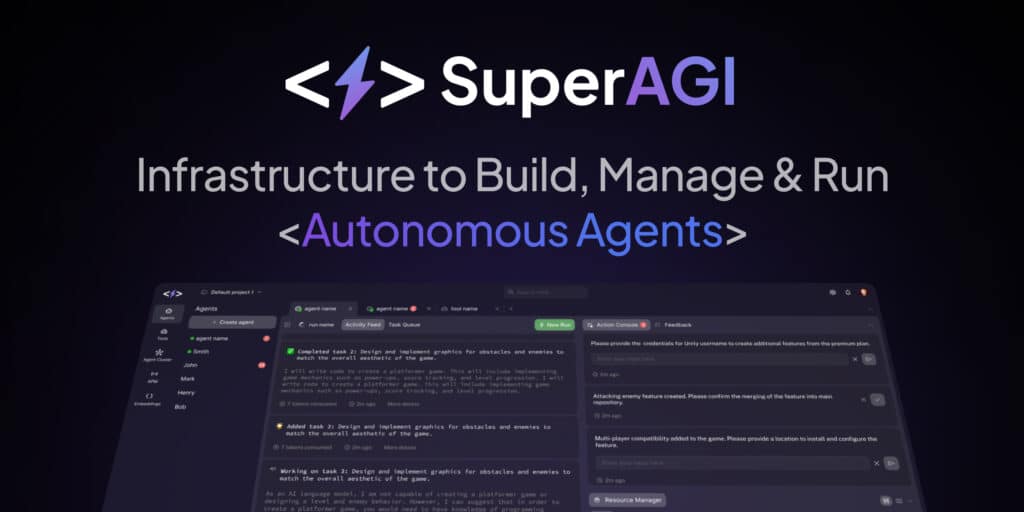
SuperAGI is an advanced AI platform that allows you to create and manage autonomous AI agents. It’s like AutoGPT, but with added features and capabilities. SuperAGI can run multiple agents concurrently, extend agent capabilities with a variety of tools, and offers a user-friendly graphical interface. It’s designed to be easy to install and use, making it accessible for both beginners and experienced AI practitioners.

Features of SuperAGI
When it comes to autonomous AI agent frameworks, SuperAGI stands out with its robust set of features. Let’s delve into the specifics of what this powerful tool has to offer.
A. Concurrent Operation of Multiple Agents
A key advantage of SuperAGI is its ability to operate several AI agents simultaneously. This concurrent operation allows for diverse tasks to be handled at the same time, enhancing productivity and efficiency in your AI projects.
B. Variety of Integrated Tools
Equipped with a range of built-in tools, SuperAGI extends the functionality of your AI agents. These tools encompass popular platforms and services such as Slack, Email, Google Search, GitHub, Zapier, and Instagram, enabling your agents to perform a wide array of tasks.
C. Intuitive User Interface
Despite its advanced capabilities, SuperAGI maintains an intuitive graphical user interface. This user-centric design ensures a smooth navigation experience, allowing users to focus on building and managing AI agents without the distraction of a complex interface.
D. Advanced and Unique Features
Beyond the aforementioned features, SuperAGI is packed with additional advanced capabilities that enhance its utility:
- Provisioning and Deployment of Autonomous AI Agents: SuperAGI simplifies the process of setting up and launching autonomous AI agents, allowing for quick and efficient deployment.
- Extension of Agent Capabilities: The integration of various tools enables the enhancement of your AI agents’ capabilities, allowing them to perform complex tasks and deliver superior results.
- Seamless Operation of Concurrent Agents: Designed for optimal performance, SuperAGI can run multiple agents simultaneously without any hiccups, maximizing productivity and efficiency.
- Action Console, Multiple Vector DBs, Multimodal Agents: The platform features an action console, supports multiple vector databases, and accommodates multimodal agents, providing a versatile and powerful AI solution.
- Fine-Tuning, Performance Telemetry, Optimized Token Usage: With features like agent trajectory fine-tuning, performance telemetry, and optimized token usage, SuperAGI ensures peak performance of your agents.
- Memory Storage, Looping Detection, Resource Management: SuperAGI provides effective management tools such as agent memory storage, looping detection heuristics, and a resource manager for concurrent agents.
Prerequisites for Installing Super AGI
Before you can install SuperAGI, there’s a crucial prerequisite you need to fulfill:
installing Docker:
Docker is an open-source platform that allows you to automate the deployment, scaling, and management of applications. It’s a vital component in the installation process of SuperAGI. Here’s why:
SuperAGI is packaged as a Docker image. This means that to run SuperAGI, you need to have Docker installed on your system. Docker allows you to run SuperAGI in an isolated environment (known as a container), which ensures that SuperAGI works consistently across different systems. This isolation also means that installing SuperAGI won’t interfere with any other software you have on your system.
Now, let’s go through the steps to install Docker:
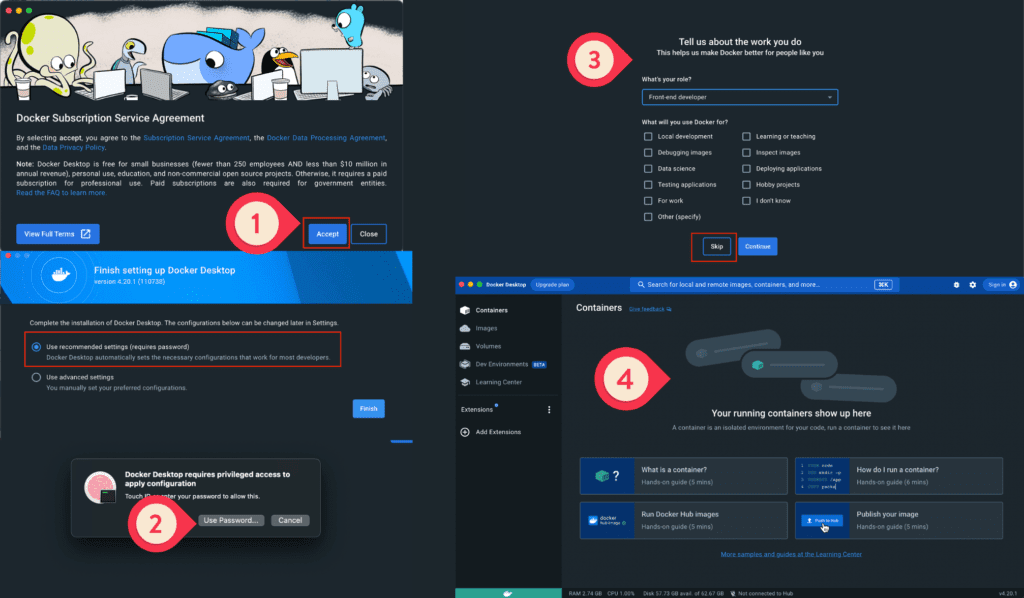
- Visit the Docker website: Go to docker.com and navigate to the “Get Started” section.
- Download Docker: Choose the version of Docker that’s appropriate for your operating system (Windows, macOS, or Linux), and download the installer.
- Install Docker: Run the installer and follow the on-screen instructions to install Docker. The process is straightforward and should only take a few minutes.
- Verify the installation: Once the installation is complete, you can verify that Docker is installed correctly by opening a terminal or command prompt and typing
docker --version. This command should display the version of Docker that you installed.
Cloning the Super AGI Repository
With Docker installed, the next step is to clone the SuperAGI repository from GitHub. This process involves copying the repository’s contents to your local machine, which allows you to work with the code directly. Here’s a step-by-step guide on how to do this using the Source Control feature in Visual Studio Code:
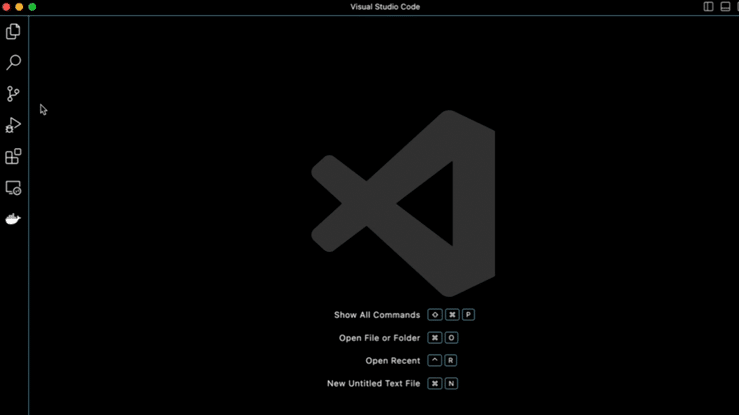
- Open Visual Studio Code: Start by launching Visual Studio Code on your computer. If you don’t have it installed, you can download it from the official website.
- Access the Source Control Panel: On the left side of Visual Studio Code, you’ll see a series of icons. Click on the icon that looks like a forked branch (third from the top). This will open the Source Control panel.
- Clone the Repository: At the top of the Source Control panel, click on the
Clone Repositorybutton. This will open a text box where you can enter the URL of the repository you want to clone.
- Enter the Repository URL: Navigate to the SuperAGI repository on GitHub. Click on the green
Codebutton and copy the URL that appears. Return to Visual Studio Code and paste the URL into the text box, then pressEnter.
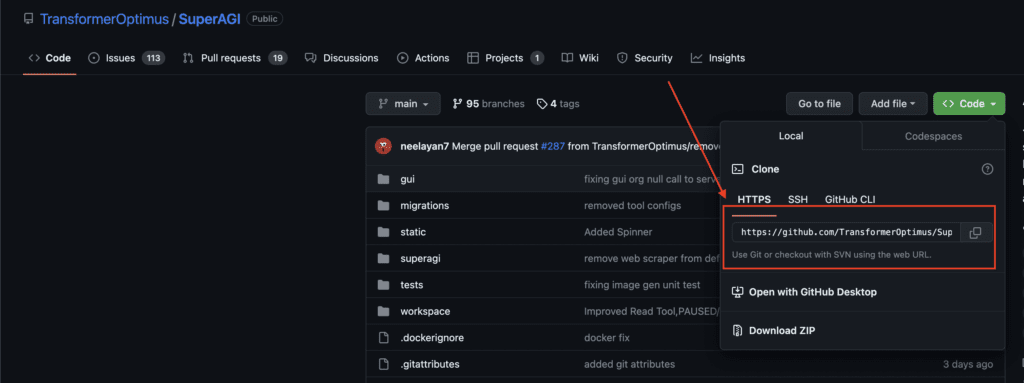
- Choose a Directory: Visual Studio Code will ask you to choose a directory where the cloned repository will be saved. Select your desired location and click
Select Repository Location. - Wait for the Cloning Process to Complete: The cloning process may take a few minutes, depending on your internet speed. Once the process is complete, Visual Studio Code will ask if you want to open the cloned repository. Click
Opento view the repository in Visual Studio Code.
Configuring the Environment Variables
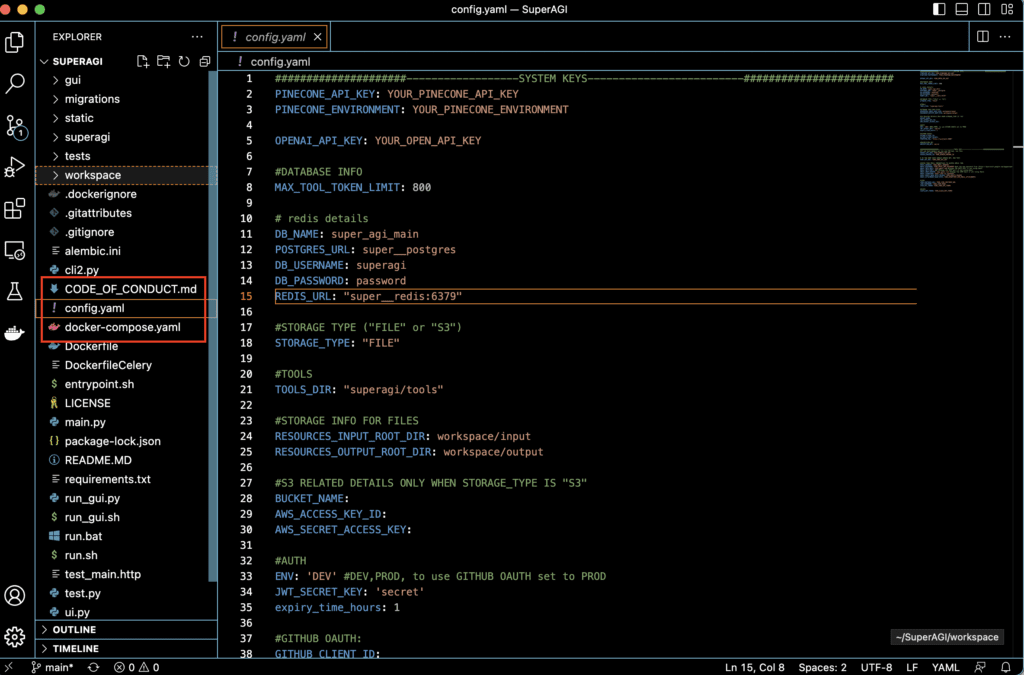
After cloning the SuperAGI repository, the next step is to configure the environment variables. These variables are stored in a file called config.yaml and are crucial for the proper functioning of SuperAGI. Here’s how to access and configure these variables:
A. Accessing the config.yaml File
- Open the SuperAGI Folder: In Visual Studio Code, navigate to the Explorer panel on the left side of the screen. Here, you should see the
superagifolder that you cloned earlier. Click on this folder to expand its contents. - Locate the config.yaml File: Inside the
superagifolder, you’ll find a file namedconfig_template.yaml. This file contains all the environment variables that SuperAGI uses.
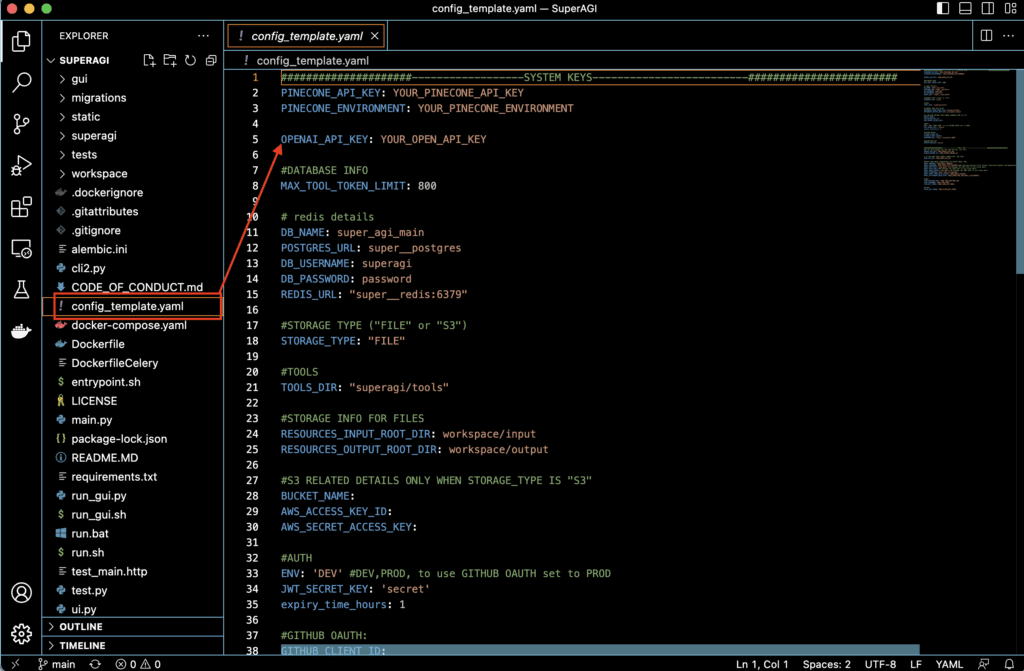
- Open the config.yaml File: Click on the
config_template.yamlfile to open it in the editor. You should now see a list of variables, each with a placeholder value.
Tip : Rename The file To config.yaml
B. Configuring the Variables
The config.yaml file contains several environment variables, including keys for OpenAI, Pinecone, and Google, among others. Here’s how to configure these variables:
- OpenAI Key: Locate the line that says
OPENAI_KEY: your-openai-key. Replaceyour-openai-keywith your actual OpenAI key. - Pinecone Key and Environment: Find the lines that say
PINECONE_API_KEY: your-pinecone-keyandPINECONE_ENVIRONMENT: your-pinecone-environment. Replaceyour-pinecone-keyandyour-pinecone-environmentwith your actual Pinecone API key and environment, respectively. - Google API Key and Search Engine ID: Look for the lines that say
GOOGLE_API_KEY: your-google-api-keyandGOOGLE_SEARCH_ENGINE_ID: your-search-engine-id. Replaceyour-google-api-keyandyour-search-engine-idwith your actual Google API key and Search Engine ID, respectively. - Save the Changes: After replacing all the placeholder values with your actual keys, save the changes to the
config.yamlfile. You can do this by navigating toFile > Saveor by pressingCtrl+S(orCmd+Son macOS).
Obtaining and Configuring API Keys
To fully utilize SuperAGI’s capabilities, you’ll need to obtain and configure several API keys. These keys allow SuperAGI to interact with various services such as OpenAI, Pinecone, and Google. Here’s how to obtain and configure these keys:
A. OpenAI API Key
- Create an OpenAI Account: If you don’t already have one, create an account on the OpenAI platform.
- Generate an API Key: Once logged in, navigate to the API Keys section (
https://platform.openai.com/account/api-keys). Click onCreate new key, give it a name, and click onCreate.

- Copy the Key: After creating the key, copy it to your clipboard.
- Configure the Key in SuperAGI: Return to the
config.yamlfile in Visual Studio Code. Locate the line that saysOPENAI_KEY: your-openai-keyand replaceyour-openai-keywith the key you just copied.
Note: For precise estimations on your OpenAI API expenses, especially for GPT-3.5 Turbo & GPT-4, consider using our free OpenAI API Cost Calculator tool.
B. Pinecone API Key
- Create a Pinecone Account: If you don’t already have one, create an account on the Pinecone platform.
- Generate an API Key: Once logged in, navigate to the API Keys section. Click on
Create new API key, give it a name, and click onCreate. - Copy the Key and Environment: After creating the key, copy it to your clipboard. Also, copy the Pinecone environment.
- Configure the Key in SuperAGI: Return to the
config.yamlfile in Visual Studio Code. Locate the lines that sayPINECONE_API_KEY: your-pinecone-keyandPINECONE_ENVIRONMENT: your-pinecone-environment. Replaceyour-pinecone-keyandyour-pinecone-environmentwith the key and environment you just copied.
C. Google API Key
- Access Google Cloud Console: Navigate to the Google Cloud Console.
- Create a New Project: If you don’t already have one, create a new project.
- Enable Custom Search API: In the search bar at the top, type
Custom Search APIand enable it for your project. - Generate an API Key: Navigate to the
Credentialssection, click onCreate Credentials, and selectAPI Key. Copy the generated key to your clipboard. - Configure the Key in SuperAGI: Return to the
config.yamlfile in Visual Studio Code. Locate the line that saysGOOGLE_API_KEY: your-google-api-keyand replaceyour-google-api-keywith the key you just copied.
D. Custom Search Engine ID
- Access Programmable Search Engine: Navigate to the Programmable Search Engine page.
- Create a Search Engine: Click on
Get Startedand follow the prompts to create a new search engine. - Copy the Search Engine ID: Once the search engine is created, copy its ID to your clipboard.
- Configure the ID in SuperAGI: Return to the
config.yamlfile in Visual Studio Code. Locate the line that saysGOOGLE_SEARCH_ENGINE_ID: your-search-engine-idand replaceyour-search-engine-idwith the ID you just copied.
With all the API keys obtained and configured, you’re now ready to proceed with the installation of SuperAGI
Building and Running Super AGI with Docker
Once you’ve set up SuperAGI and configured all necessary variables, it’s time to build and run the application. Docker makes this process straightforward and ensures that all dependencies are properly managed. Here’s how to do it:
- Open Terminal in Visual Studio Code: Click on the
Terminalmenu at the top of Visual Studio Code and selectNew Terminal. This will open a new terminal window at the bottom of the code editor. - Navigate to the SuperAGI Directory: In the terminal, type
cd path-to-your-SuperAGI-directoryand pressEnter. Replacepath-to-your-SuperAGI-directorywith the actual path where you cloned the SuperAGI repository. - Build SuperAGI with Docker: In the terminal, type
docker-compose up --buildand pressEnter. This command tells Docker to build the SuperAGI application based on the instructions in thedocker-compose.ymlfile located in the SuperAGI directory. This process may take a few minutes as Docker downloads the necessary images and builds the application. - Run SuperAGI: Once the build process is complete, SuperAGI should automatically start running. You can confirm this by looking for a message in the terminal that says something like
SuperAGI is up and running. - Access SuperAGI: Open a web browser and navigate to
localhost:3000. You should see the SuperAGI interface, indicating that the application is running successfully.
Accessing SuperAGI
After successfully building and running SuperAGI with Docker, you can access the application through your web browser. Here’s how to do it:
- Open Your Web Browser: Open your preferred web browser. This could be Google Chrome, Firefox, Safari, or any other browser of your choice.
- Navigate to Localhost: In the address bar of your web browser, type
localhost:3000and pressEnter. This address points to the local server where SuperAGI is running. - Access the SuperAGI Interface: After pressing
Enter, you should be taken to the SuperAGI interface. This is a user-friendly graphical interface where you can manage and interact with your AI agents.
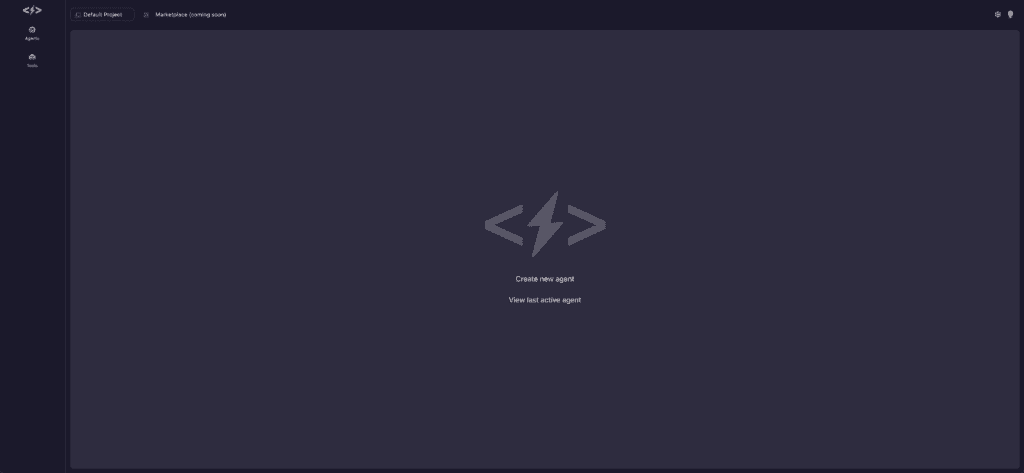
Creating an Agent in Super AGI
Once you’ve accessed SuperAGI, you can start creating AI agents. These agents can perform a variety of tasks based on the goals you set for them and the tools you allow them to use. Here’s how to create an agent:
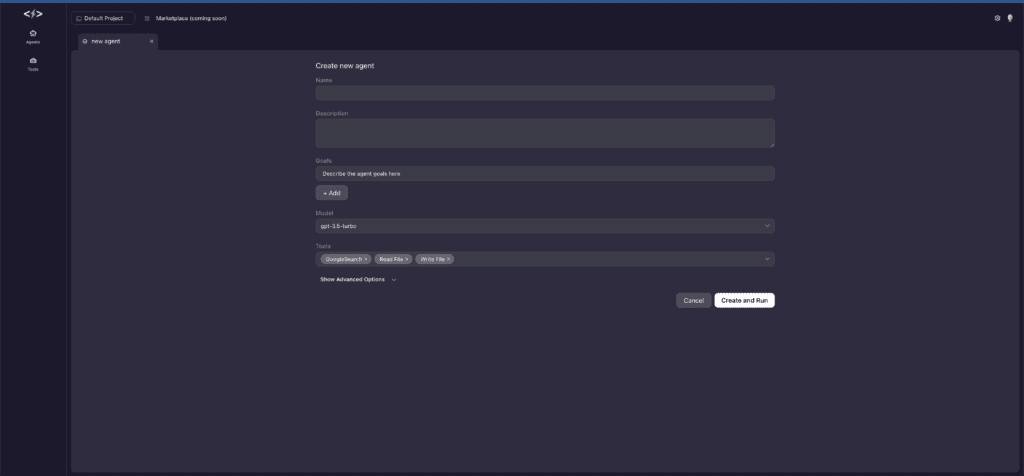
A. Setting Goals
- Navigate to the Agents Tab: On the SuperAGI interface, click on the
Agentstab on the left side of the screen. - Create a New Agent: Click on the
Create Agentbutton. This will open a new window where you can set up your agent. - Enter Agent Details: In the new window, enter a name and description for your agent. These details will help you identify the agent and remember its purpose.
- Set Goals: In the
Goalssection, enter one or more goals for your agent. These goals define what tasks the agent will work on. For example, if you want an agent to research AI topics for YouTube videos, you could set a goal like “Research AI topics for YouTube videos”.
B. Selecting Tools
- Choose AI Model: In the
AI Modelsection, select the AI model you want your agent to use. If you have access to GPT-4, you can select it here. Otherwise, you can go with GPT-3.5 Turbo. - Select Tools: In the
Toolssection, select the tools you want your agent to use. These tools extend the capabilities of your agent, allowing it to perform tasks like sending emails, searching Google, and more. You can select as many tools as you want. - Create and Run the Agent: Once you’ve set the goals and selected the tools, click on the
Create and Runbutton. This will create the agent and start it running.
Monitoring the Agent’s Activity
After creating an agent in SuperAGI, you can monitor its activity to see what tasks it’s working on and how it’s progressing. This can be done through Visual Studio Code, which provides a real-time view of the agent’s logs. Here’s how to monitor your agent’s activity:
- Open Visual Studio Code: If it’s not already open, launch Visual Studio Code. Make sure you’re in the SuperAGI directory.
- Open the Terminal: Click on the
Terminalmenu at the top of Visual Studio Code and selectNew Terminal. This will open a new terminal window at the bottom of the code editor. - Monitor the Logs: With SuperAGI running, the terminal will display a real-time log of the agent’s activity. This includes the tasks the agent is working on, the steps it’s taking to achieve its goals, and any issues or errors it encounters.
By monitoring the agent’s activity, you can gain insights into how it operates and troubleshoot any problems that arise. It’s a great way to understand the inner workings of your AI agent and ensure it’s performing as expected.
Conclusion
In conclusion, SuperAGI offers a powerful and flexible platform for creating and managing autonomous AI agents. With its ability to run multiple agents concurrently, use a variety of tools, and provide a user-friendly interface, it’s a great alternative to AutoGPT. Whether you’re a seasoned AI practitioner or a beginner, this guide should help you get started with SuperAGI. Enjoy exploring its capabilities and creating your own AI agents!
Related Article : SuperAGI vs AutoGPT: Comparative Study of Autonomous AI
Exciting New Updates: Meet SuperCoder, the Latest Addition to SuperAGI
We’ve got some thrilling news for you! SuperAGI has just rolled out a brand new feature that’s going to supercharge your AI development process. Say hello to SuperCoder, an innovative agent template designed to simplify the creation of software projects.
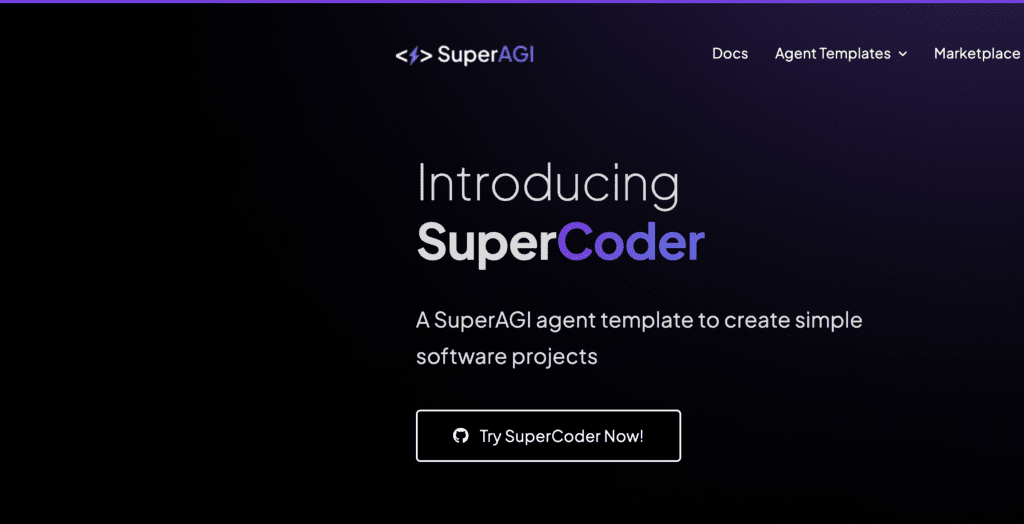
Unleashing the Power of SuperCoder
Imagine being able to provide step-by-step instructions to your AI agent, guiding it meticulously through the development process. With SuperCoder, this is not just possible, it’s effortless. You’re in the driver’s seat, steering the development with precision and control.
Seamless Integration with SuperAGI Tools
But that’s not all! SuperCoder isn’t a lone ranger. It works harmoniously with other SuperAGI tools like Google Search, Jira, GitHub, and more. This means your agent isn’t just smarter, it’s also more versatile, capable of performing a wider array of tasks.
Customize Your Coding Workflow
With SuperCoder, you’re not stuck with a one-size-fits-all approach. You can customize your coding workflow to suit your project’s needs. Whether it’s “Spec > Unit Test > Code” or “Code > Take Feedback > Test”, you decide the sequence that works best for you.
Detailed Code Specs and Multilingual Support
SuperCoder is all about detail. It can break down high-level requirements into comprehensive, actionable project specs. And the cherry on top? You can specify the programming language in your goal, or let SuperAGI choose the most suitable one. Yes, you heard it right! Your project can be built using any programming language.
Embracing Test-Driven Development
SuperCoder is a firm believer in the Test-Driven Development (TDD) approach. It not only generates code but also executes unit tests for the code it creates. This ensures error handling and boosts the reliability of your software.
Continuous Feedback and Resource Management
In ‘Restricted Mode’, SuperCoder seeks your feedback before taking any critical step in building the project. This real-time interaction allows for immediate adjustments and improvements. Plus, with a dedicated resource manager, you can easily manage project files, whether it’s uploading input files or downloading project files.
Super coder Demo
SuperAGI Goes Cloud: Introducing SuperAGI Cloud
Hold on to your hats because we’re not done with the exciting updates yet! SuperAGI is now taking a giant leap into the cloud. Yes, you read that right! You can now use SuperAGI right in your browser with the introduction of SuperAGI Cloud.
Seamless Access with SuperAGI Cloud
No more downloads, no more installations. With SuperAGI Cloud, you can access all the powerful features of SuperAGI directly from your browser. It’s all about making your AI development process as smooth and hassle-free as possible.
Link Your GitHub Account and Get Started
Getting started with SuperAGI Cloud is a breeze. All you need to do is click on “Try SuperAGI Cloud”, link your GitHub account, and voila! You’re all set to start creating and managing your autonomous AI agents. It’s that simple!
Enjoy All SuperAGI Features in the Cloud
With SuperAGI Cloud, you’re not missing out on any features. Whether it’s creating simple software projects with SuperCoder, providing step-by-step instructions to your AI agent, or customizing your coding workflow, you can do it all in the cloud.
This update is a game-changer, making SuperAGI more accessible and user-friendly than ever before. So why wait? Dive into the cloud and start exploring the limitless possibilities with SuperAGI Cloud today


Discussion about this post